Tuesday, July 30, 2019

Wonder Woman Mini

Hey there everyone, just wanted to share a fun little mini album I created with you using the Wonder Woman Collection.  This is a great collection to showcase all of the Wonder Woman in your life.  You can see all of the goodies on the Paper House site HERE.   **DON'T FORGET TO USE MY DESIGN TEAM CODE PH19STACY FOR 20% OFF YOUR ORDER**

So I had this mini album laying around in my stash and thought it was perfect for this collection.  Lets start with the cover.  You can see I did a little fussy cutting of the Wonder Woman insignia to pop that up on the cover, a little washi tape on the top and bottom (which by the way has gold writing on it) and finished the cover off with some stickers from the collection.


 Now lets dive inside and check it out. I placed some photo mats through out, embellished this page with some of the stickers as well and it's hard to tell but created a little flap on the far right page.


The next page I cut apart of of the paper and used that as a fun pocket withing the album...great for photo mats and anything else you want to stick in there.


I loved adding the border stickers to the sides of the photo mats to make them pop a little.


Of course you never want to throw and little piece away so I used some punches for the circle and the arrow as a fun little embellishment on the side.


Well I hope you have enjoyed my Wonder Woman mini album.  Again you can find of these goodies on the Paper House Site HERE!!  Grab yours today and create your own Wonder Woman mini.

Supplies Used:

Wonder Woman™ Confidence And Strength Foil Paper

Wonder Woman™ Tags Foil Paper

Wonder Woman™ Amazon Princess Foil Paper

Wonder Woman™ Portraits Foil Paper

Wonder Woman™ Faux Enamel Stickers

Wonder Woman™ Comic Washi Tape Set

Wonder Woman™ Logos Faux Enamel Stickers

~Stacy

Thursday, May 9, 2019

Where The Wild Things Are Handmade Mini Album

Hello all my scrappy friends.......today i'm sharing with you my next project that I created for Paper House Productions, hop on over to their blog HERE.  It's a mini album, and of course there is a video.....and this collection Where The Wild Things Are is super fun and for all of you inkers out there.....well Walnut Stain totally nailed it!!

Ok so I have created a quick little how to video on YouTube which you can find on my channel HERE or on Paper House Productions Channel HERE!  This video is just in time for a cute gift idea for Mother's Day (perfect projects to give all those loving grandmothers of the wild kiddos)

Let's start with the cover.....the cover is two pieces of chipboard cut to 4 1/2" X 6" and all of the pages inside are pre-scored cards that are 4" X 5 1/2".  You obviously can make this any size you would like.  You can get bigger cards or simply cut and score cardstock to whatever size you would like.


This paper collection is so fun...the puffy circle stickers that come in the paperpack are awesome.....as is the 12X12 sticker sheet that comes with it!!!  Let me show you a close up of the cover and you can see I gave the tree a little dimension since there was a "Wild Thing" in it!


Ok so for the spine of this album, if you watch the video you will see that since this is crafted from scratch you will want to hide the seems, which is where the washi tape for this collection comes in!  Obviously the thicker you make this album the more of the washi tape you will see.


Now for a peak at the inside......now i'm only sharing a couple peaks with you here if you want to see this super fun mini album and learn how to make it you are going to have to head over to YouTube and check it out.  I promise it's not a marathon movie, just a fun quick little how to video.

Supplies Used:
Chipboard
May Arts - Black polka dot ribbon
Adhesive -3M
Cards - The Paper Studio

Well everyone, thanks for stopping by....don't forget to check out the video at Paper House Productions YouTube on My YouTube Channel.

~Stacy

Friday, April 19, 2019

Stargazer Photo Holder/Journaling Book

Today i'm excited to share with you my first project as part of The Paper House Productions Design Team.  Hope over to the BLOG and check it out!  Paper House has these totally awesome journaling books and covers....you can check them out HERE!  

I'm a mini album girl.....I love everything mini album related, and I love to create fun flaps, pockets and cute little additions to any mini album.  I wanted to find a way to combine some type of mini album/photo holder along with the journaling book so this is what I came up with.


The colors in this Stargazer collection are so vibrant and stunning.  I have created a basic instruction sheet to give you the measurements on the size of your paper/cardstock and where to score your paper at just in case you want to re-create this.

There are fun flaps, pockets, decorated tags, photo mats, washi tape, stickers, twine.....you know all the fun stuff you need to create a project.  Here are a couple of photos of the finished project.


Hop on over to The Paper House Productions YouTube channel and also my YouTube channel to check out the video and a fun little extra mini version of this tri-fold photo holder.

Supplies Used:
Paper House Productions Stargazer Paper Collection
Paper House Productions Stargazer Journey Book Insert Set
Paper House Productions Violet Journey Book Cover
Paper House Productions washi tape
Paper House Productions Stargazer Cardstock Stickers
Paper House Productions Stargazer Enamel Stickers
Xyron - Adhesive
The Twinery - Pink/white twine
Misc - paperclips
Bazzill - Cardstock

Thanks for stopping by, next month i'm creating a mini album from scratch using The Paper House Collection Where The Wilds Things Are....stop over and grab this collection so you can create along with me.

~Stacy

Sunday, March 24, 2019

Paper House Productions

Hello everyone, i'm excited to share that I will be joining the design team for Paper House Productions!!  I'm super excited to be part of this team and work along side many talented designers.  Check out this super cool team!


Below are the links to all of these talented ladies so you can stop by and check out their creative work.  I am looking forward to sharing so fun projects with you starting in April.  

Connie Mercer

Dasie Hanson

Erika Breslin

Lindsey Cooley

Lisa Hidy

Sandie Reverski

Sukie Dhillon

Christine Meyer


Be sure to catch up with us as we start creating some fun projects with Paper House Productions

Saturday, April 7, 2018

Graphic 45 2018 Brand Ambassador Audition

Hello everyone, thanks for stopping by to check out my Graphic 45 Brand Ambassador Audition.  It's no secret that I have loved Graphic 45 products for years....they are amazing to work with and easily transform any project into a unique work of art.  With that being said I would like to share two projects that I created for this audition.  


My first project is a little step by step.  I wanted to try something different so I combined my love of Graphic 45 with my love of airplants!!  I altered a idea-ology Tim Holtz assemblage clock.  The Nature Sketchbook was a perfect collection for this project.

First I gathered my creative goodies.


I painted the clock using Ranger Claudine Hellmuth Studio gesso and let dry over night.  After that was dry I added a little Ranger Studio 490 Wendy Vecchi embossing paste and let dry.


I didn't want to leave it plain white so I used Ranger Perfect Pearls (Cappuccino) spray and heat set it.  I started out light because you can always add more until it is just the way you want!


It wouldn't be a true Graphic 45 project without a little fussy cutting right?!?


I cut out a circle piece of the collection and placed it inside of the clock at the back, then it was time to start embellishing.  I tied some ribbon and burlap around the top handle, glued a die cut clock I had in my stash off to the side and the hands of the clock are held together using a Graphic 45 Staples brad.  I also cut part of our tree outside that is just starting to bloom to add to the project.


In the photo below you can see I added a Graphic 45 metal butterfly mixed in with all of the butterflies that I cut out from the collection.  The blue flower to the right is actually flower die cuts from the Couture Collection held together with another funky vintage Graphic 45 Staples brad.


 I placed a couple of rocks inside of the clock, along with some flowers I made with a Sizzix die out of the paper collection.


I then added my airplants and now I have a really cool and unique way to display my airplants.


Up next....I LOVE to create mini albums!!  These are truly probably my favorite projects to create.  For this mini album I used Steampunk Spells.  You can't go wrong with this collection!!  I created this using the hidden hinge binding system.  There are tons of flips, belly bands, and fun pockets to stash photos, potions or whatever you want in.


The cover has so many fun things on it.  Chipboard pieces and banner pieces from the collection, along with some Petaloo flowers, metal key lock, and the side of it I added some washi tape.


It stays closed using May Arts ribbon that I adhered to the inside covers.


 Now for the fun pages inside!!


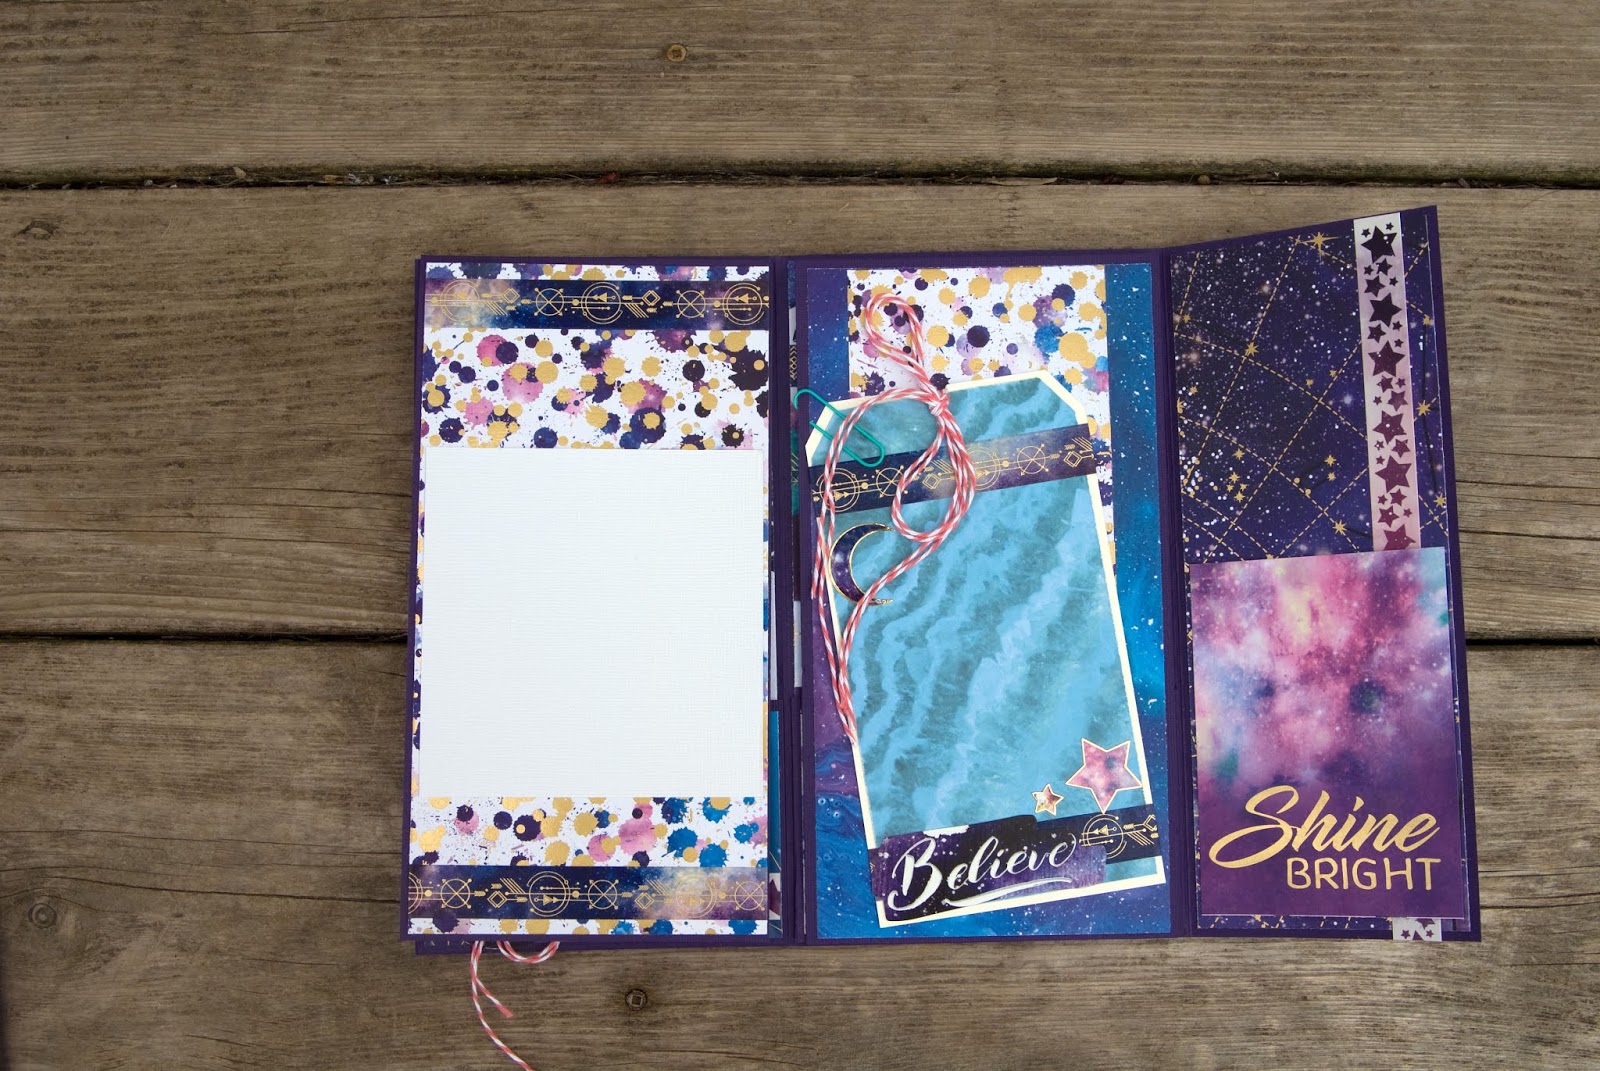
There is a flip page on the left side and on the right the tags & pockets piece flips down allowing you to pull out a trifold page completely decorated on the front and back.  You can see in the pockets, belly bands, tags and all the goodies you can fit into this one! 


Decorating this mini was easy with all of the banner and stickers pieces.  On the page below that flip up page has a band added to the front with a sticker tag tied around it and just under it I placed one of the tags & pockets pieces.


 I love layering embellishments and popping them up at different levels. 


 I hope you have enjoyed my creations using the amazing Graphic45 collections.  Below is a list of supplies used on these projects in case you want to give them a shot.  If you have any questions on how I created something feel free to reach out and send me an email to srod74@mchsi.com.

Supplies Used:

Mini Album
~ Graphic 45 Steampunk Spells Collections (paper both 8x8 and 6x6 paper pads) , sticker sheet, banners, tags & pockets
~ Graphic 45 Staples - Washi tape, Ornate Metal Key Hole
~ Petaloo burlap poinsettias (teal), sugared berrys (teal) mini pearl dasies
~ Ranger Ink - tags, distress ink (walnut stain)
Xyron - Adhesive
~ Twine

Altered Clock
~ Graphic 45 Nature Sketchbook
~ Graphic 45 Couture flower pieces
~ Graphic 45 Staples - stamped metal brads
~ Ranger Ink -  gesso, embossing paste, perfect pearls (cappuccino), distress ink (walnut stain)
~ Sizzix tattered pinecone die

Thanks again for stopping by, you check out all of the amazing Graphic 45 products/and the amazing creations from the design team on the Graphic 45 blog HERE.

Have a creative day!!
~Stacy


Saturday, March 17, 2018

U and Me } Formal 2016

Ah to be young again.....today I'm sharing a layout that I created using some Jillibean Soup products of the kids at one of their college formals.  I adore black and white photos and in this layout I think it played very well with the patterns that I used.

You can see that I did a little layering of paper under the photo, along with sliding a couple of file cards under the side which was a perfect spot for the year of this formal using alphabeans blue corn navy.


On the right side of the layout I did a little cluster of embellies and some fun title work.....and the saying on the notebook tags was simply spot on!! "When it doubt dance it out"  I mixed some various Jillibean Soup letters together (Mini alpha hollyberry, beanboard alphas roma red, and the "me" I actually took off of one of the veneer clothespins)   


Here is the finished layout.  I really love the how everything seems to pop off of the soup staples III background paper.


You can find a list of the supplies used below.  Thanks for stopping by today!!

Supplies Used:
Jillibean Soup Collections - Soup Staples III, Grandmas Lima Bean Soup, Watermelon Gazpacho Soup
Jillibean Soup Goodies - Notebook tags (everyday), family note cards, soup staples file cards, buttons (orchard)
Xyron - Mega runner
~Stacy

Thursday, March 8, 2018

A Little Altered Photo Fun

I know all my scrapping friends know Jillibean Soup has a design call going on right now....i'm giving it a shot.  I sat and went back and forth on what to create for my "other" project!!  I love to make mini albums so that was going to be my thing, but then I started thinking i'm going to alter something.  I wanted to make and altered wood block photo holder.....so I asked hubby (who is into wood working) if he had any wood in the garage that he could cut a couple of blocks for me.....that took him all of about 3 minutes.....so I got creating!!

I altered two wooden blocks and stacked them on top of each other, then using a Tim Holtz pin at the top for the photo holder.

I used tons of fun pieces from several collections and embellishments on this one!  For this projects I did ink the edges so everything seemed to blend well with the wooden blocks.  So this is the front of the blocks.  I started by placing all of the base papers on the blocks, then I stained some seam binding with broken china distress stain and wrapped that around the bottom block.  Next I cut out a couple of flowers on the bottom block and layered them, popped one up and finished them off with a Jillibean button and some twine along with a little "XO" using roma red beanboard alphas.


I used one of the pea pod parts so that it stuck out from behind the photo and I simply love the veneer clothespin at the top!


The saying on the notebook tag could not have been more perfect for this project, as well as the remember this circle behind it!


Now for the finished project, I love how it turned out and what a great fun way to display a photo!!


Supplies Used:
Jillibean Papers - Soup Staples III, Pasta Fagioli, Coconut Lime Soup, Coordinating Alphabet Soup
Jillibean Soup Pea Pod Parts - Grandmas Lima Bean, Hearty Barley, Sweat & Sour
Jillibean Soup Alphas - Beanboard Alphas Roma Red
Jillibean Soup Buttons - Orchard & Typography
Jillibean Soup Notebook Tags - Everyday
Xyron - Mega runner
Twine Expressions - Brown twine
Seam Binding
Ranger Ink - Broken China distress stain, Walnut Stain distress ink


Thanks so much for stopping by, hope this inspires you to create a unique photo holder!

~Stacy